Speed, efficiency and simplicity are the watchwords of this new way of managing your training certificates, directly from the Mission Center.
Hot on the heels of automatic translation of training content, Teach on Mars is pursuing its strategy to simplify the lives of Mission Center administrators. This month, discover a new, autonomous, quick and efficient way of managing your training certificates.
As you already know, a certificate is a diploma which is sent to a learner’s email address after they successfully complete the activities in a training course certifying module. The diploma is in PDF format and is personalised for each learner.
You can now create the certificate in PowerPoint format, import it into the Mission Center and assign it to a course. Let the Mission Center take care of the rest!
First step: create your certificate in PowerPoint
Microsoft PowerPoint provides a range of templates for creating certificates, but you can also start with a clean slate and make certificates featuring your company’s branding. Alternatively, download one of our pre-filled templates from the Mission Center.
Once the certificate template has been created, add elements which will later be replaced by personal data: first and last name, date the certificate was obtained, course title, and so on.
In the Mission Center you’ll find a glossary of labels you can use. For example, in the place where you want the learner’s first name to appear, write {d.first_name}.
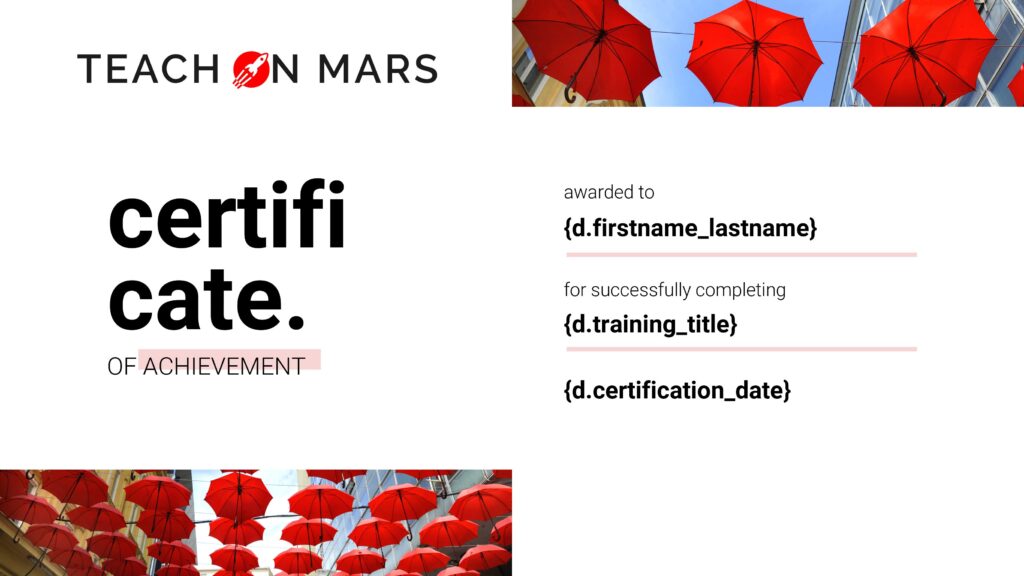
You now have a highly personalised certificate that you can save in PowerPoint format.
Second step: import your PowerPoint certificate into the Mission Center
When you import your document into the Mission Center, you get an automatic preview of your certificate with the data of a fictitious learner. In this way, you can instantly check that the labels you have added are correct, and that the certificates sent to your learners include the required information.
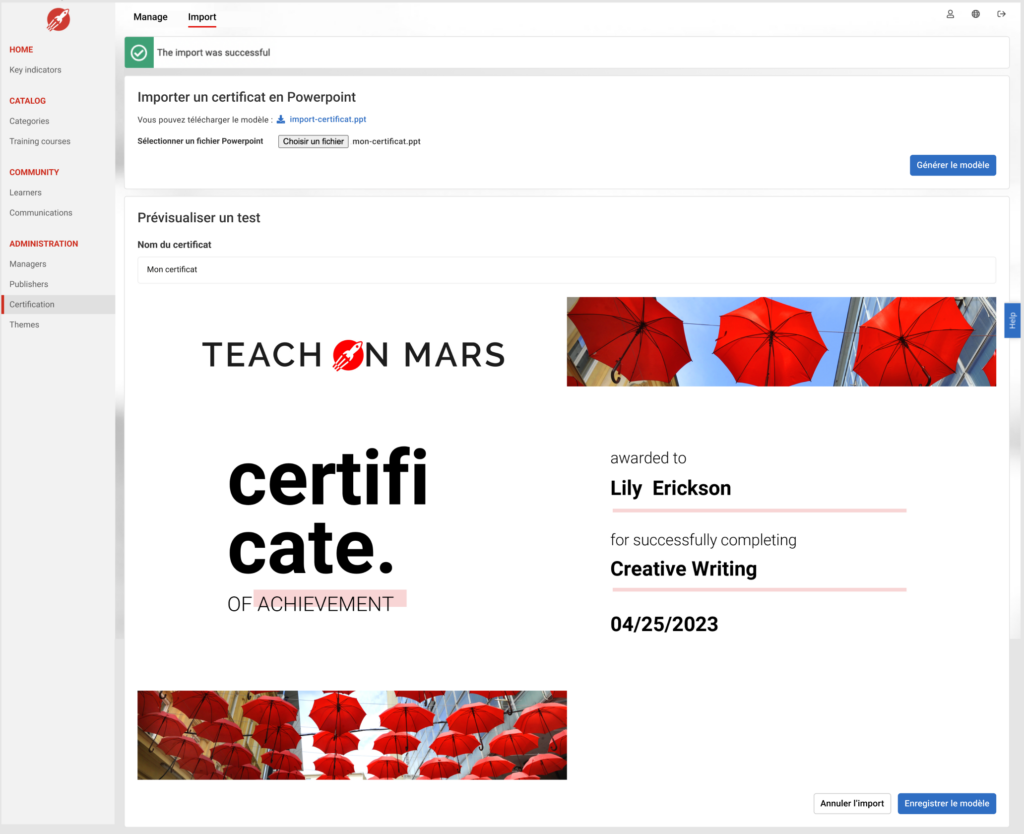
Then you can name your new certificate template and save it in the Mission Center.
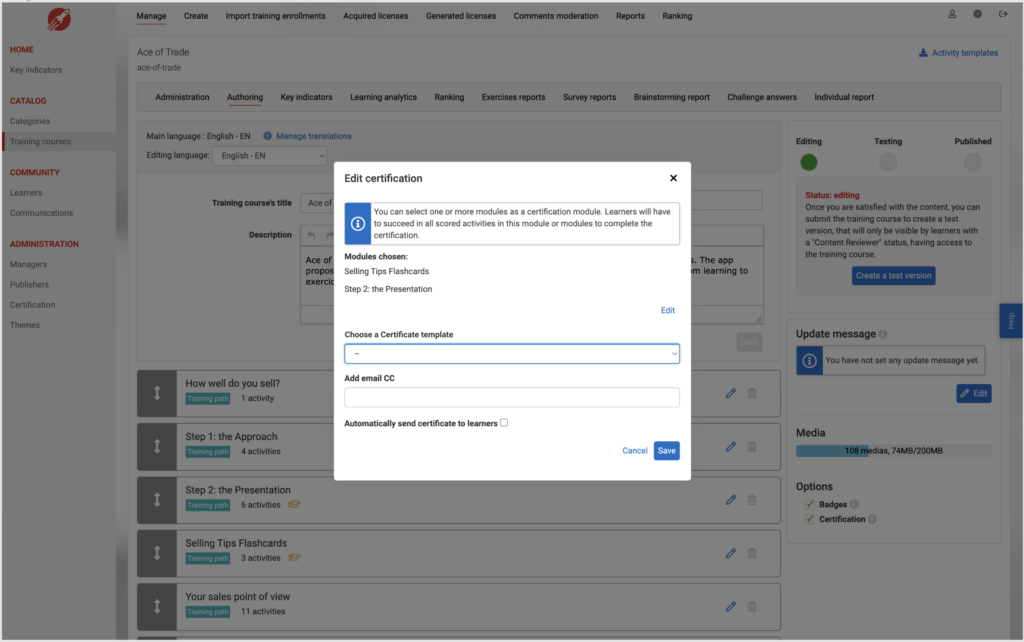
Third step: assign a certificate to your cours
When editing your training content, tick the ‘Certification’ box, then select the certification template you wish to use.
You’ll find all the imported certificates and ‘LEGACY’ certificates in a drop-down list which correspond to those imported before the feature was activated.
Remember that a certificate is attributed upon completion/success in activities of one or several modules of the chosen course.
So that learners can receive their certificate automatically, remember to tick the ‘Automatically send certificate to learners’ box.
Final step: publish your course!
Learners having obtained the certificate will receive it automatically in PDF format directly in their inbox! When assigning the certificate, you can add your email address to track your learners’ performance and to be copied in to receive each personalised certificate.
As well as the ultra-simplified process which is offered, the super admin can now manage certificates from the Mission Center on a dedicated page.
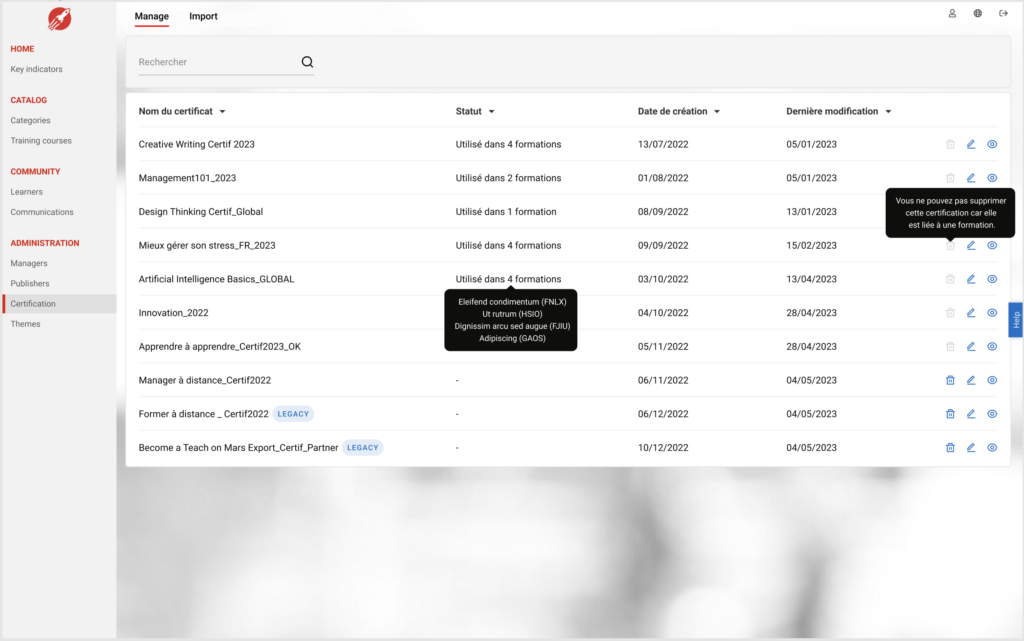
In short, you get greater simplicity, rapidity and efficiency, without disrupting the Learner experience. Thanks to this new process, you can use certification as a new motivation lever for your learners by making it more consistent.
Get ready, set, certificates!
The new certificate management feature will be available before the summer in all Mission Centers, with no added costs.
Marielle has been travelling in the Teach on Mars rocket ship for 6 years. After having contributed her skills in pedagogical engineering and training facilitation to guide clients towards success, she is now Product Owner, in charge of designing the new features of the solution.